The internet is full of misinformation about the squat. You will hear things like knees behind toes and torso vertical. If you go too low, you will destroy your knees and your back…
I’m here to tell you that you don’t have to worry about any of those things, especially if you follow the correct progressions of movement at the right time to build tolerance for the movement and take it slow.
We will get into the steps, but first we must bust some myths.
Your knees can travel over your toes and they are meant to!
Everyone’s torso length is different so everyone’s squat will look slightly different. You can hinge at your hip, that’s what it is supposed to do when you squat. (Side note: I would not round your spine while squatting though)
Squatting lower does not mean you are going to damage your knees; in fact, it can make you more resilient and make your knees healthier in the long run.
There is a ton more to get into as to why these things are true which I will get into in another blog here but you came here for a squat progression not an anatomy lesson.
Again this is for beginners so we are starting from the bottom here. If you want info on how to improve your back barbell squat I will write another article on that.
This is the same progression we use at our Kirkland Redmond Ridge and Woodinville personal training studios. We have been using it for the past 10 years to help people move pain-free and make consistent progress.
The Progressions
Here is a quick video going over the progressions from our youtube channel.
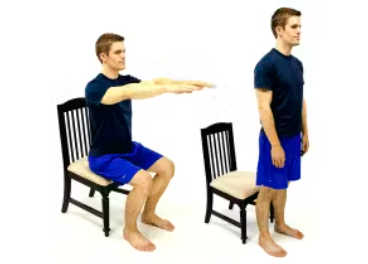
This one is very simple and you do it every day anyway. Its the plan and process around it that makes it magical. All of our clients start here as a movement evaluation to see where they are weak and how their body moves.
Here are the steps
Find a chair or a bench at the gym
Set your feet 4-6 inches away from the bench
Set your feet about hip width apart
Turn your toes out slightly (About 15 degrees)
Keep your eyes and chest up
And sit back to the bench
Adjust stance and hip width according to what is most comfortable for you
Do this 2-3X per week for three sets of 8-12 reps, and pretty soon this will be too easy. Then… its time for progression two!
Before we jump to that, though, watch out for these pitfalls.
Knee aligned with toes: we can have a little bit of knee turn in, but we don’t want too much, so keep those knees out.
Rounding your back: Get in the habit of staying tall so we can carry that over to the later progressions.
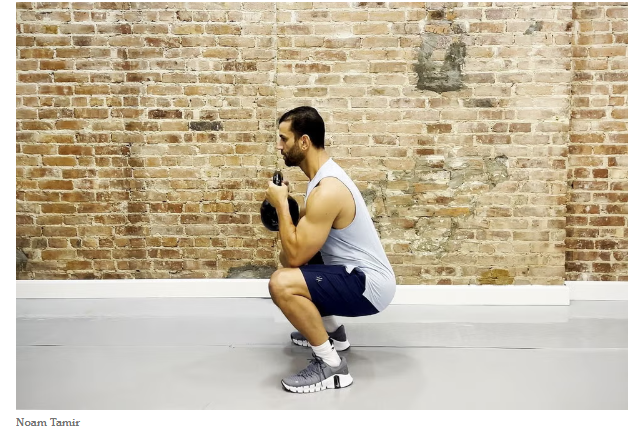
Progression #2: The Goblet Sit to Stand
Simply add weight to this movement… I know it sounds mind-blowing, but that is sometimes all that is needed to progress something up a level.
Start with a 10-15lb weight and keep the same rep scheme from above.
You are going to hold the weight in your hands under your chin tight to your chest. As a reminder, keep that chest high.
Now is the time to work on your depth. Since the bench is gone, you now have to work past the height of the bench. Now the knees will move over the toes… because they have to!
Let it happen, your ankles are meant to bend that way, it will save your back and work your quads more than stopping half way
Again same reps and sets and if you need some more progression from here ditch that 10 and opt for a 20lb dumbbell.
(Quick warm up tip) If you use a light weight like a 10# plate and reach it away from your body as you squat down it will help teach you where your hips should be and how to get lower in your squat.
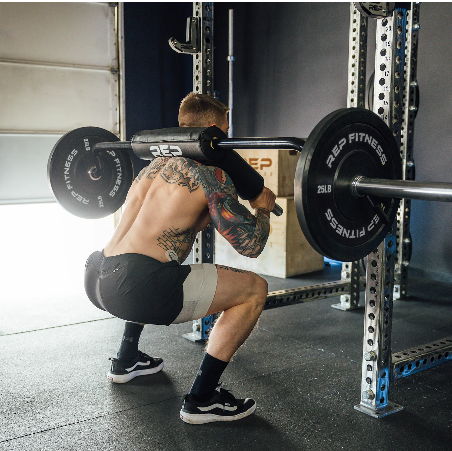
Progression #4: The Back Barbell Squat
Now I could write an entire article on this movement but let’s just keep it simple
Once you have progressed your goblet squat to about 35-45lbs for 3 sets of 10 you are ready for the bar. Now if you have any shoulder issues you may want to start with a specialty bar like a safety squatbar.
To keep the back barbell squat simple you will follow the same form tips as above with one slight change… now there is a bar on your back.
You want to start by setting the bar up a little lower than shoulder height.
Place your hands right on the breaks of the knurling and pull your head directly under the center of the bar
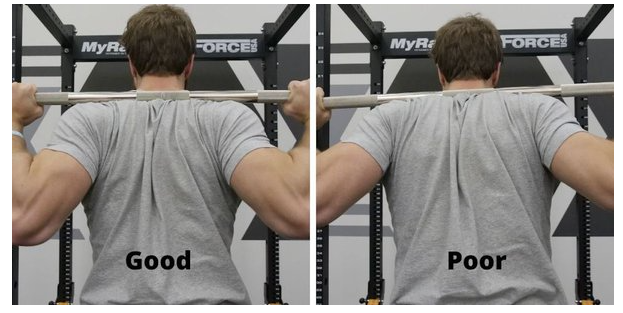
Squeeze your shoulder blades together
Once in position, place the bar (While still racked) under the bottom of your neck on your back. At our gyms we call this the ‘meat shelf’ The bar should not be on your neck but lower, placing it on your upper back.
You will preform the same movement with one distinct change. You are going to hinge more at your hips naturally because you are moving the load from in front of you to behind you.
One cue that really helps our clients at our gyms is to push back into the bar as you come up from the bottom of the squat.
If you made it this far good job you made it through all progressions in a logical safe fashion.
If you want more help with squats and really become an expert going into much more detail than we did in the blog fill out a form and a coach will help you really dial it in. Happy squatting!